The Toe-Dip Method for changing URL structure

If you build websites or offer SEO services, unquestionably at some point you have run in to the question of the trade-offs and risks of changing the URL structure on a website.
For example, a website might have the following URL structure:
https://www.website.com/2019/04/26/the-post-title/
Whereas you would prefer to have something similar to either of these:
https://www.website.com/the-post-title/
https://www.website.com/articles/the-post-title/
You probably also know that such changes can be incredibly risky. If you work in either of the above mentioned disciplines, you likely feel the weight of the responsibility you bear either to your own business or your clients' businesses.
If you don't, just a very short summary: your content ranks where it does (let's say, first page of Google) because Google has found its URL, and it confident that if someone searches for a relevant query, it can send them to that URL and they will find the information they seek.
If that URL does not exist anymore because you have changed your URL structure and have not managed the change properly, your traffic also does not exist anymore.
Suggested reading to brush up on URL structure and redirects
There is quite a lot of subtlety in getting this right, and much has been written on the subject. This post on the Moz forum covers the general gamut of questions and concerns.
We highly recommend this post from Ahrefs on the subject. The short version is this: You get this wrong you can kill their business - or at least severely hinder it for the near-term, along with your reputation. Take that as our disclaimer for pursuing this.
However, what that post does not cover, and what we have found to work incredibly well for safely changing URL, is the method described in this post.
We call it the Toe-Dip Method for changing URL structure.
Why do a canon ball when you can simply dip in your toes?
Canon balls are great at pool parties with well-dressed company, but when it comes to advising our clients' businesses, changing the scenery calls for a bit more subtlety.
This post describes how to make substantial changes to the URL structure of a website, without risking tidal waves.
We use Wordpress in this post (since there is a good chance you are using it), but the same concept would apply equally in other popular content management systems as well.
So let's dive in. ...er, test the waters.
A bit of background
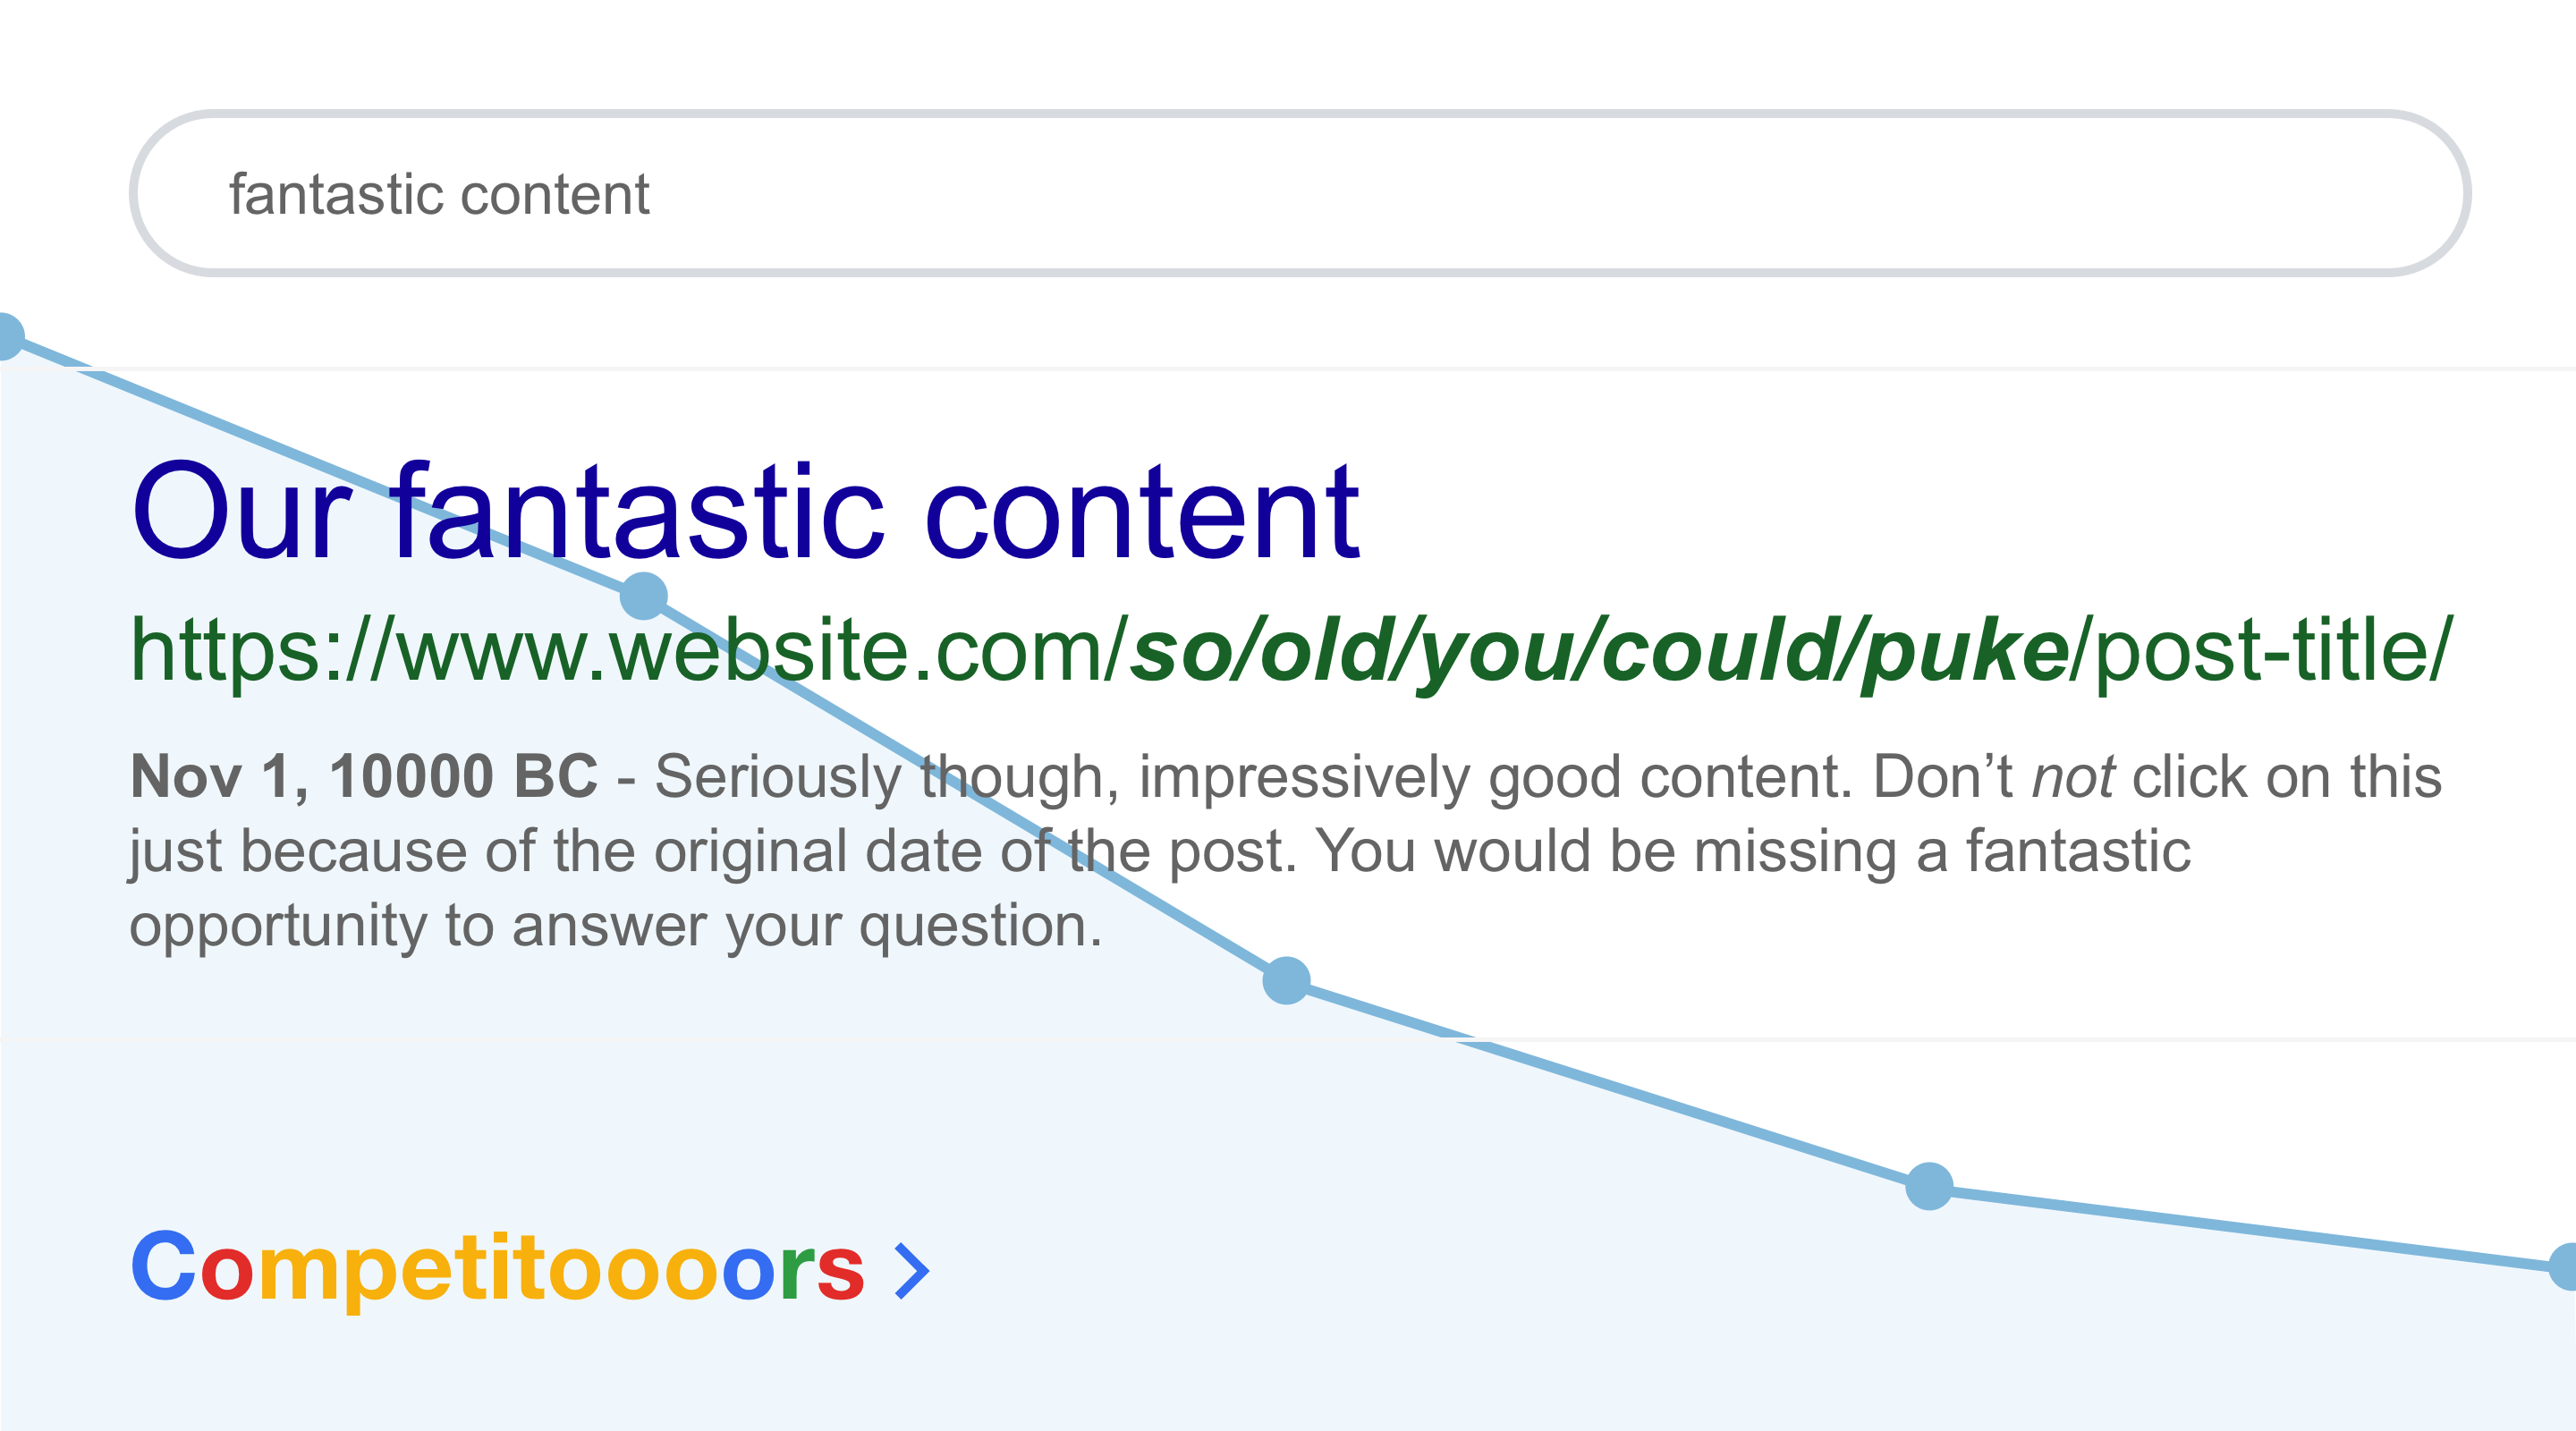
One of our clients with well over 10,000 posts on their website has, since the inception of the site used the date-based structure above (site.com/yyyy/mm/dd/post-title). What this means is that many of their high-quality posts are showing up in search results like this:
What makes matters worse is that this client's industry is one where, rightly or wrongly, freshness of content is seen as an exclusive mark of relevance. So, even if search engines rank the content highly, their organic CTRs are unquestionably somewhat depressed by the age of the content.
Due to the competitiveness of the space, it has become a near imperative to change the URL structure, to ensure they are putting their best foot forward in every regard.
An idea dawned on us as to the best way to optimize risk vs. reward once we decided on the new URL structure:
https://www.website.com/articles/post-title
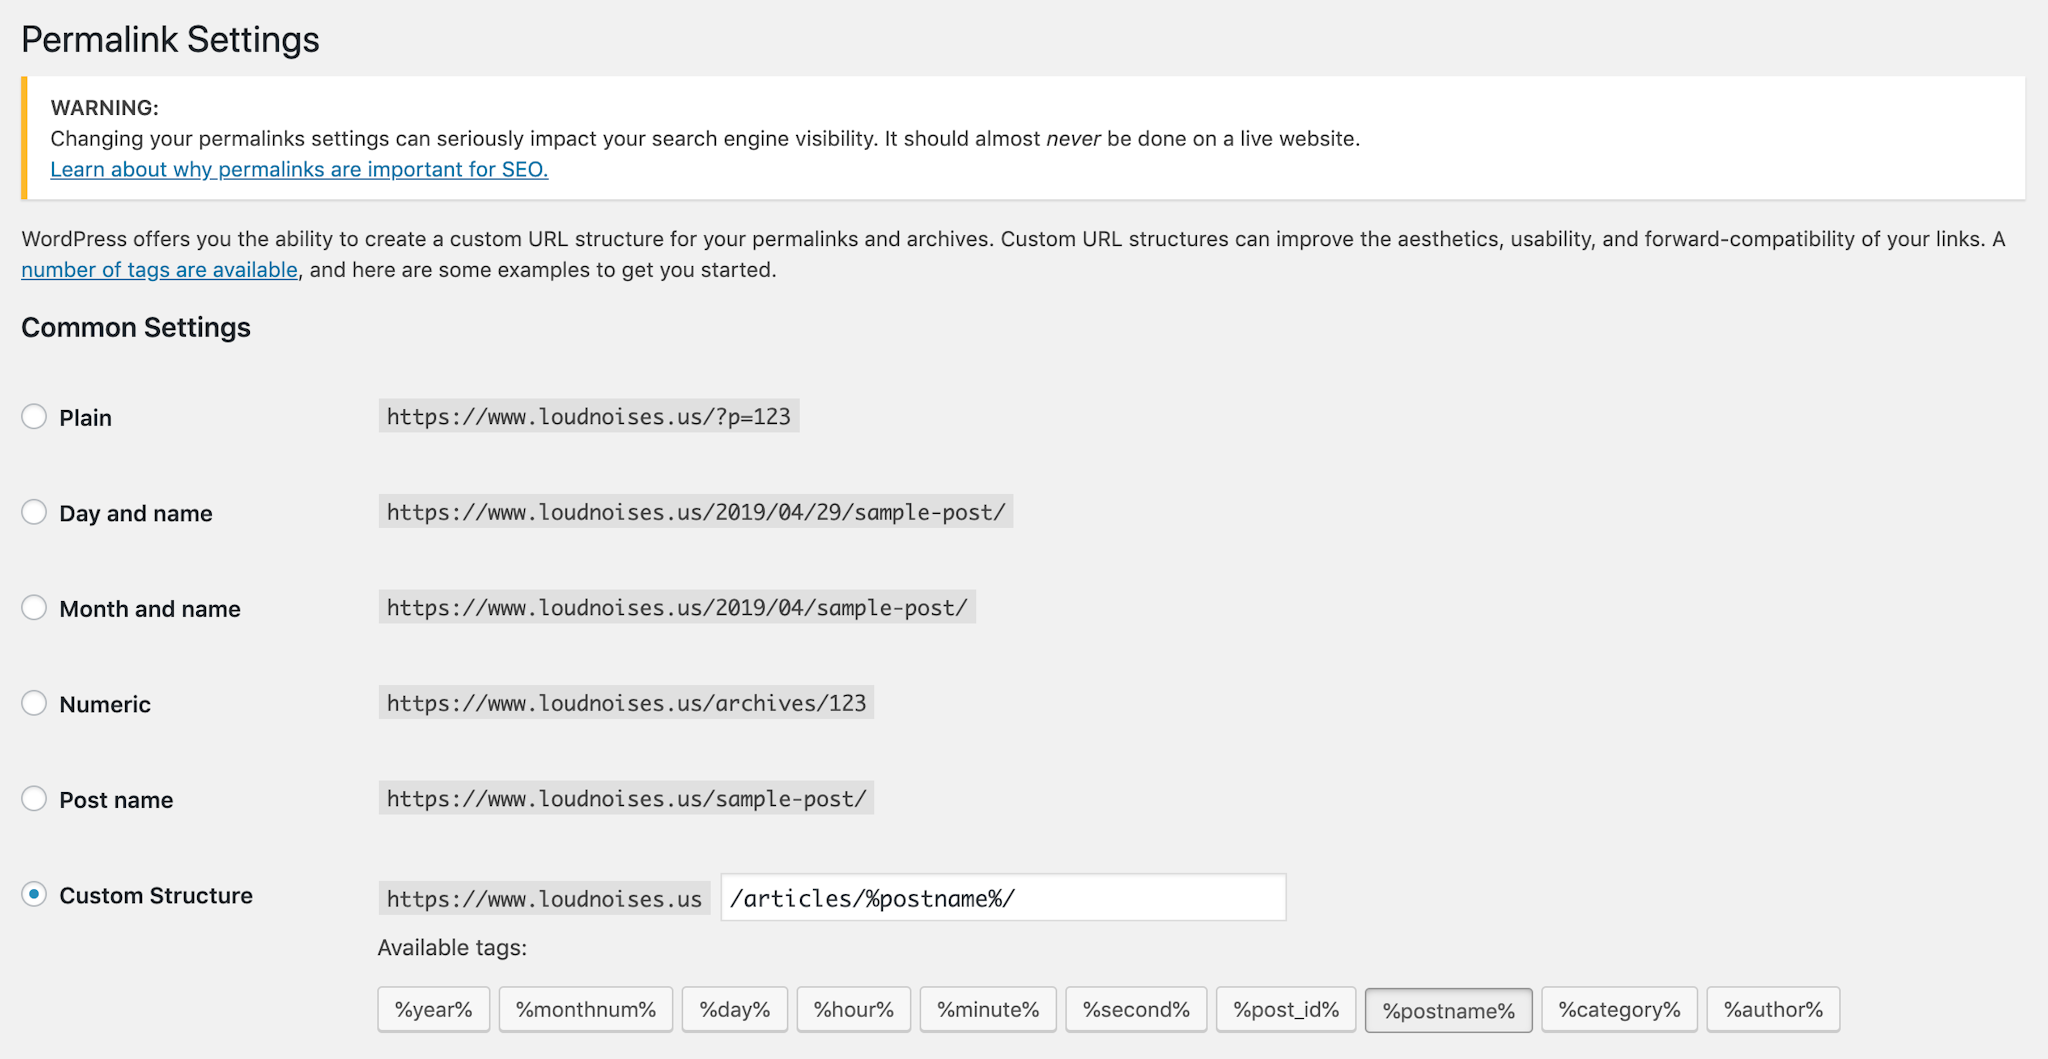
Consider this: if you are a veteran Wordpress user, the first thing that comes to mind when considering URL structure is the Permalink Settings page in WP Admin:
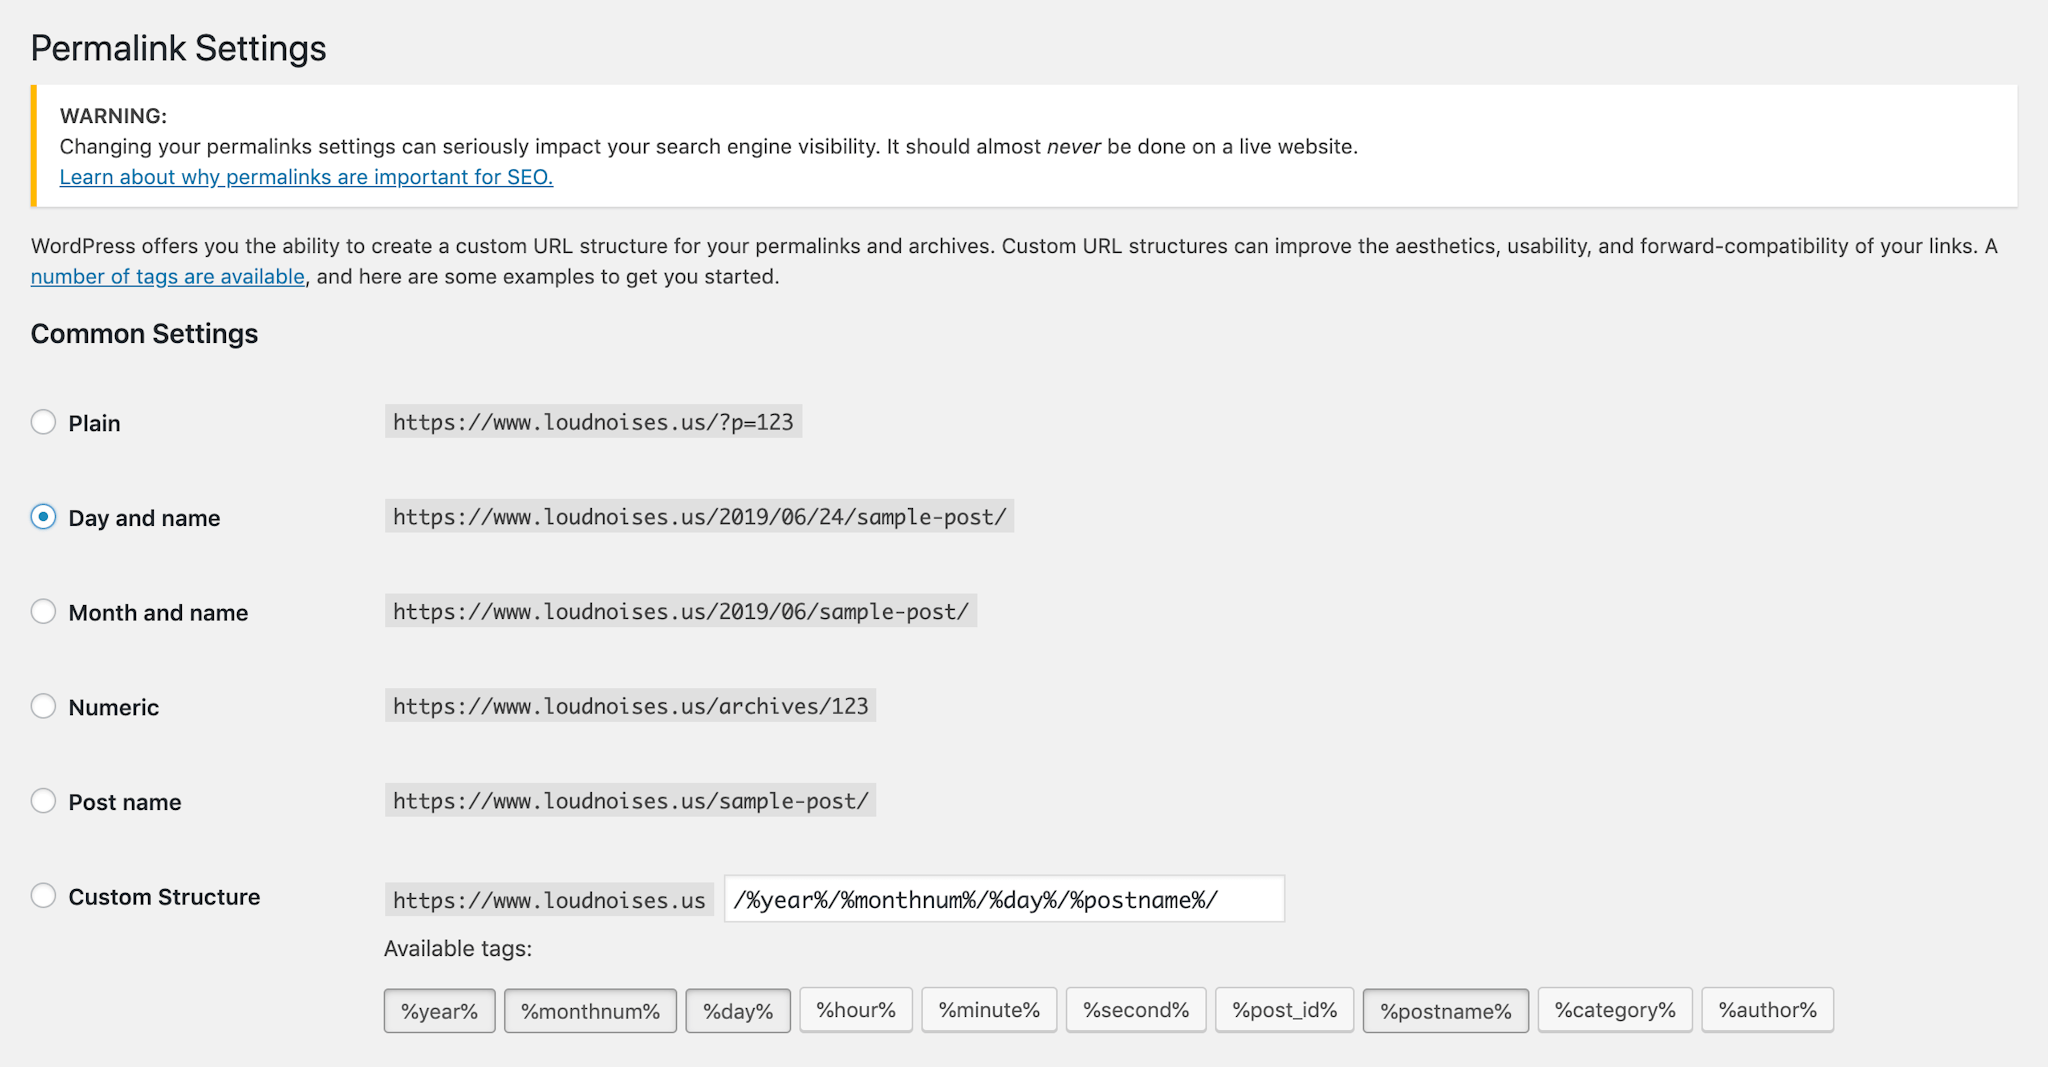
If you are not familiar with this screen, it's where you tell Wordpress how to structure the URLs of Posts on your site. It's a simple tool to manage something with huge impact. We'll come back to this screen later in the post to finalize our changes after doing lots of testing.
But the problem with looking at this page for a solution is that URL structure changes made here are all-or-nothing: change the setting on this screen and every post immediately changes, site-wide.
As the Yoast SEO plugin warns us at the top of this screen:
Changing your permalinks settings can seriously impact your search engine visibility. It should almost never be done on a live website.
Yoast SEO Plugin
How, then, could we test this new URL structure on just a subset of posts, say 20 or so, and then evaluate the results? Would search engines find the new home of the content without devastating rankings?
Here is how we did exactly that.
The Toe-Dip Method, explained
We begin by creating a new custom post type called "Articles" (which will have a slug of "articles"). The best way to create and manage custom post types is the Wordpress plugin called CPT UI, or Custom Post Type UI.
Install that plugin, and then create your new custom post type called "Articles". If you need instructions on setting up a new CPT, view the documentation.
The best way to find out which posts to test URL changes with is to go to your Google Analytics (or similar) and find some posts that have substantial traffic, but may not be your top posts (again, mitigating risk). Make a list of the posts you want to test, save their names and URLs somewhere convenient, as you will want to come back to your analytics again several times over the coming weeks to evaluate performance.
Now to change the post-type of the posts in question, you will need to do one of two things.
You should either:
-
Have database access and know-how, in order to find the ID of the post in question, and manually change the value of the
post_typefield fromposttoarticle, if you feel confident doing so. This method will be the faster, by far, as you begin to include lots of posts in the test. If you don't feel comfortable making this change, make sure to hire a developer, and of course, back up your website first! Or, -
Install Post Type Switcher, and make the change from the post edit screen. Here is a post on making the change with this method. Note: this method will become tedious as you include more and more posts in your test.
Use your chosen method for each post you want to test, and then a bit of magic happens. Since Wordpress processes requests based on the post-type of a post, you don't even need to manually create any redirects! As soon as you request the old URL again, Wordpress will automatically redirect you to the new url location at:
Use your chosen method for each post you want to test, and then a bit of magic happens. Since Wordpress processes requests based on the post-type of a post, you don't even need to manually create any redirects! As soon as you request the old URL again, Wordpress will automatically redirect you to the new url location at:
https://www.website.com/articles/post-title
In this way, the work is actually extremely minimal to accomplish the desired result. Our test posts now use our new, final URL structure, the rest of our content has no idea anything has changed, and we can sit back and wait to gather new analytics data to see how the changes proceed.
Before you move on, make sure you double-check that each URL is redirecting properly and everything works as expected. Would be a shame to have your test fail for an honest mistake.
Establish test performance intervals
Now that you have your test in place, we recommend closely monitoring the performance of these URLs over the coming days and weeks. We used the following schedule to make sure we were keeping a close eye on things:
- One day after
- Three days after
- One week after
- Two weeks after
- Three weeks after
Why wait a full three weeks? Things change a lot with SEO and website performance, sometimes quickly, sometimes slowly. Our decision to run these tests for so long was based in the fact that we have a way to de-risk this change, and there was no substantial urgency, so why rush things and add risk by moving too fast? You can, of course, adjust your testing schedule to meet your the needs of your organization.
As alluded to previously, we started with only 20 medium-impact posts for our first test batch. Having seen success there (see "Our Results" below), we moved on to a larger batch of 100 posts, then 500 posts, then 1,000, then the remaining thousands of posts. Again, de-risking such a massive change was of critical important to us.
Worth noting, however, that as we established confidence with each subsequent test, we used shorter and shorter confidence intervals.
Evaluating performance: setting up a quick report
The method we used here is fairly simple but extremely powerful, and once it's setup, dead-easy to use.
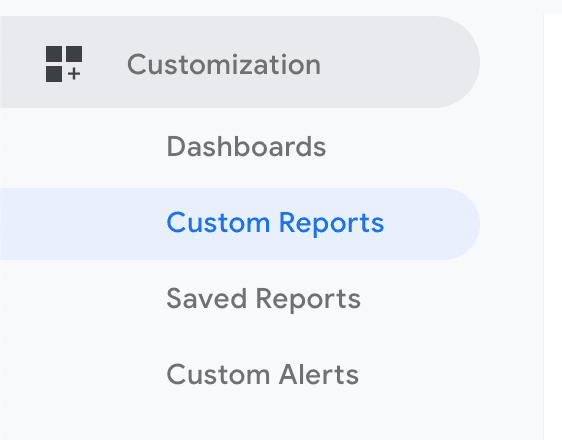
We're going to be creating a custom report in Google Analytics, which filters for the URLs we're interested in. Open up your Google Analytics, and click on Customization->Custom Reports from the top of the sidebar:
Then, setup your report to match the settings we show here:
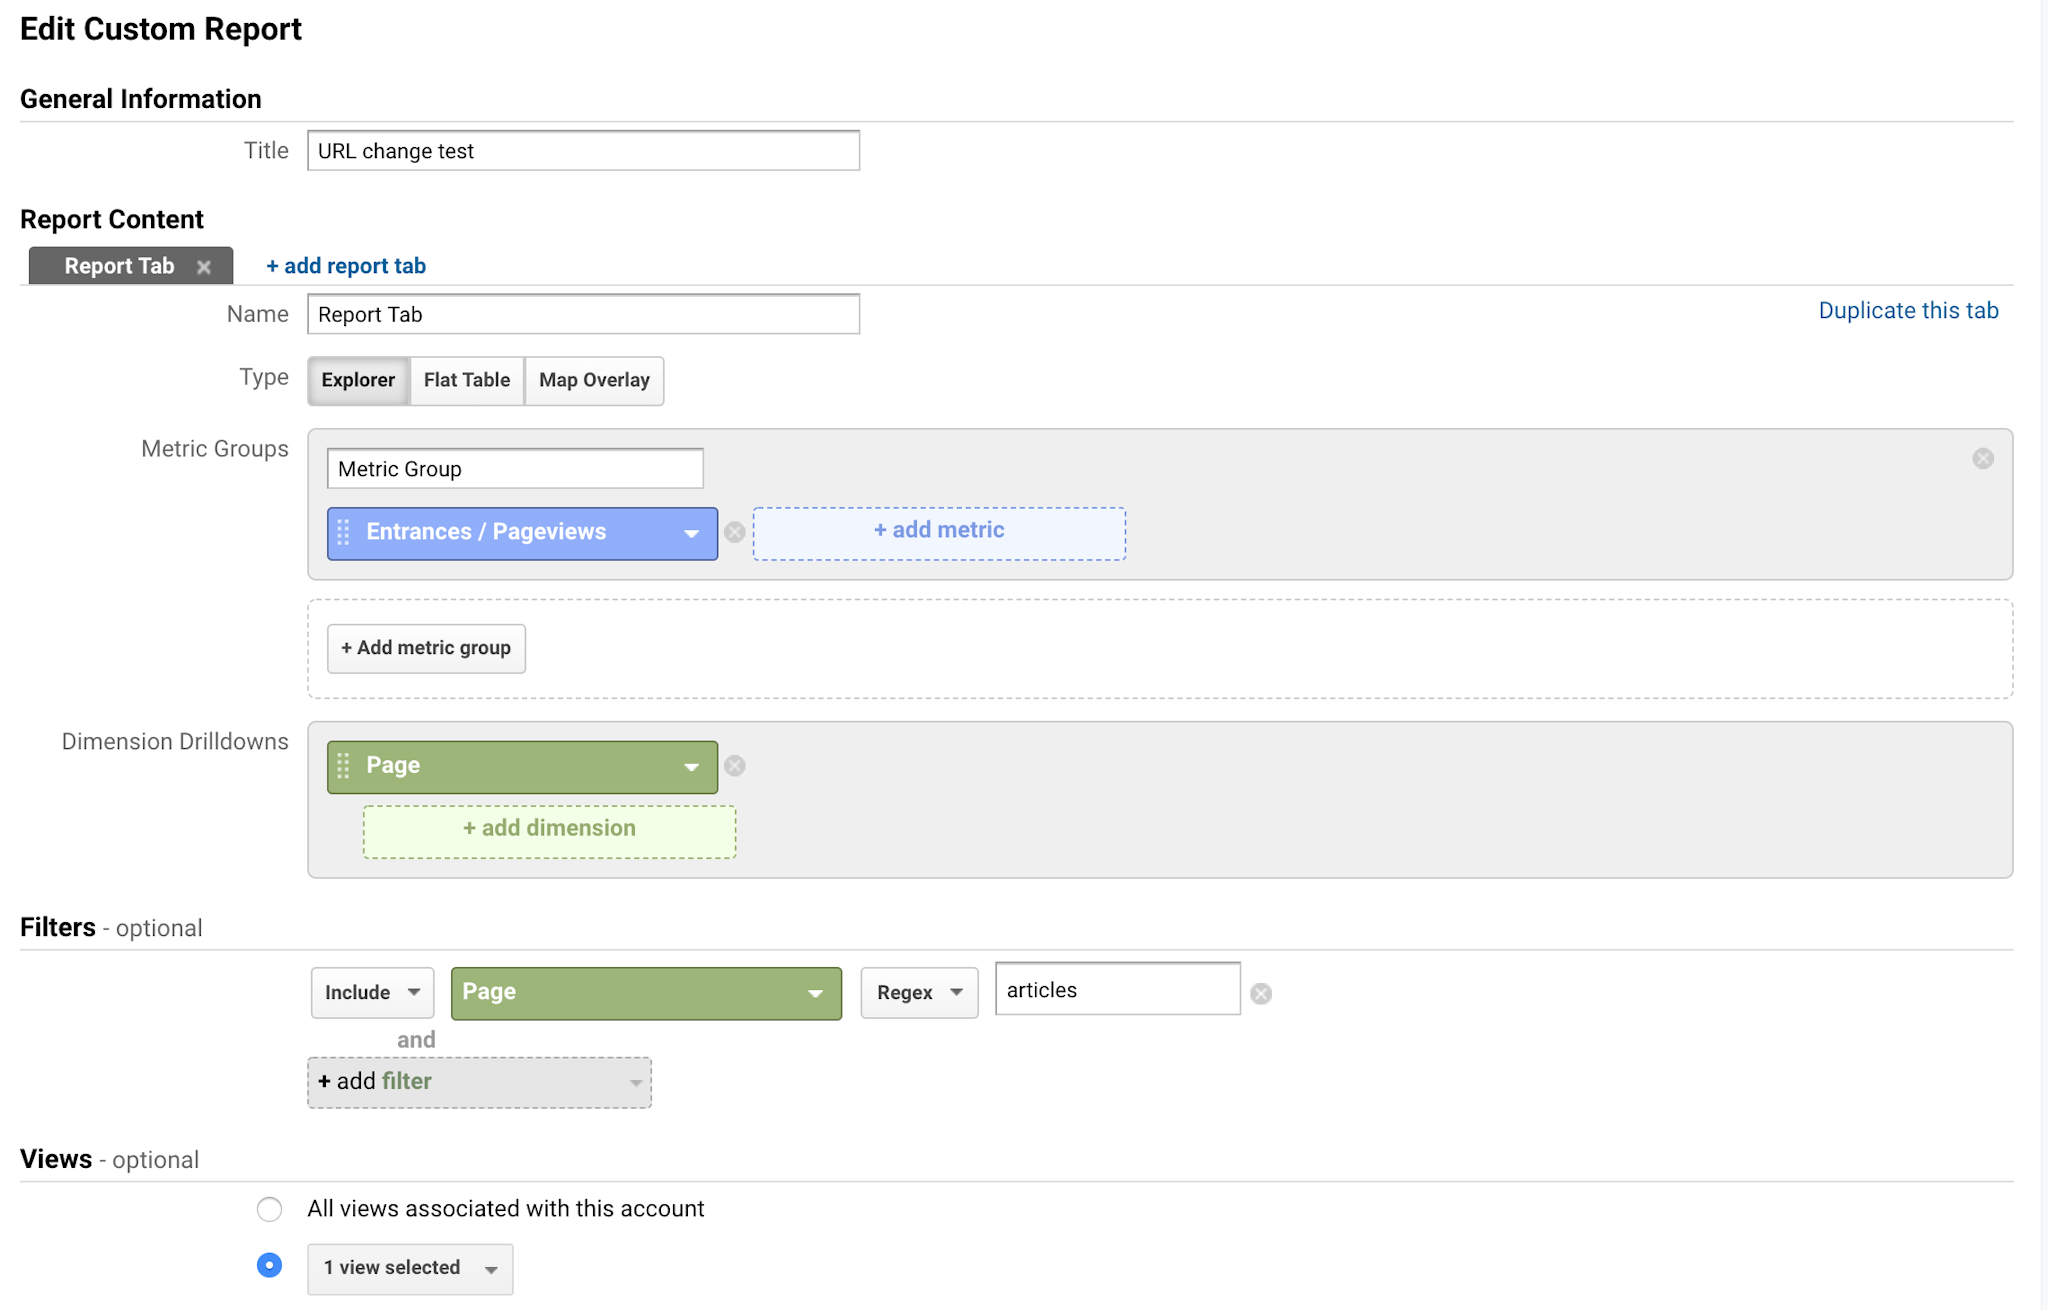
Feel free to add any metrics you find relevant, but in this example we have just added "Entrances / Pageviews", as the primary thing we are concerned with here is the impact of this URL structure change on traffic.
The slight bit of "magic" going on here is that under Filters we have included a Regex filter on "articles". This is where the power of this report comes in, as we add new posts to the test, they will be automatically included here.
Note: as you include new URLs in the test, your traffic in this report will also increase, so be sure that you create Notations in your report to keep a log of when you have added new URLs, otherwise it will look like performance has skyrocketed (which it may possibly do, thus the utility of the notation).
With our filtered report setup, we can now evaluate our low-risk URL structure change test, and see if this is a change we should be rolling out site-wide.
Time to make waves: Making the final change
So, you've ran the tests described above, and traffic performance is (hopefully) either flat or has improved to some degree, as measured by your custom Google Analytics report. You've gained confidence that this is the right direction to take without risking your (or your client's) business.
Let's make it official.
Before we begin, make sure to backup your website (including your database) in case you make any mistakes or need to revert your changes for any reason.
The final steps in this process end up being a bit nuanced, but completely doable if you (or your developer) have a bit of "techiness". Why?
Well it may seem that all that remains now is to go to Settings->Permalinks again and assign a custom structure that starts with /articles/, as you see below:
DO NOT DO THIS - unless you have (and will always have) only one post type on your site. Then it should be ok. But TEST!
The problem that comes up is that if you have any other post types on your site, this change will also prepend /articles/ to URLs of that post-type as well.
So we're going to approach making this change with a four-step approach here: using the Permalinks settings and some simple logic in your functions.php. Have your code editor ready and this file open, as you will want to make these changes very quickly (or you risk impacting users). Of course think though the change before saving, but when you are ready to move - move!
Step 1: Edit permalink settings
Go back in to Wordpress admin, and go to Settings->Permalinks once more, and make the change that you see here (look to the Post name area):

If you have multiple post types on your site, this is the setting you want, combined with the rest of the steps below
Now save your changes. But we're not quite done yet!
Step 2: Adding logic to tell Wordpress to prepend /articles/ to Posts only
Add the following to your functions.php file, editing the articles bit as needed, if you are not using exactly that string for your new URLs.
Grab the code snippet for this funcion at this Gist
The action (see add_action) rewrites the URLs for our posts. The filter (see add_filter edits the post links that Wordpress generates at various places throughout the backend and frontend of your site.
Step 3: Reassigning articles as posts
We still need to reassign the post-type of all of the posts we assigned to the Articles post-type earlier. Use whatever method you selected above to change the post type on these posts back (will be much faster if you chose the database option. Be sure to hire a developer to make this change if you don't feel confident doing so yourself).
Then, delete the Articles post type from your site using the CPT UI plugin.
Step 4 and a "gotcha": Regex redirects from your web server
Remember when Wordpress easily handled changing from /yyyy/mm/dd/post-title to /articles/post-title? Well, that's not going to be the case now, because by changing the permalink structure, we've effectively interrupted the mechanism that was at play before (Wordpress was giving us the benefit of the doubt based on the post type).
Since we are now outside of Wordpress' mechanisms for handling redirects, we will need to give our web server specific instructions on what to do when requests for date based (/yyyy/mm/dd/post) URLs are received. We use Nginx, and here is the little snippet we came up with to handle this final step:
location ~ "/([0-9]{4})/([0-9]{2})/([0-9]{2})/(.*)" {
  return 301 https://www.website.com/articles/$4;
}
Here we create a location block in our Nginx server using a regular expression which will respond to any routes with the format /yyyy/mm/dd/, and redirect the request to whatever we set inside the block. The $4 part of the snippet means basically "the fourth part of the regex above", which in this case is the slug for the URL, absent the date (which is composed of parts $1, $2, and $3 (not used here).
If you use Apache instead of Nginx, review this post on Stack Overflow, which seems to have the solution.
Test thoroughly!
Now, check out your site to make sure everything is still working properly. If you've followed the instructions above, all of your Posts should now be free of the old date-based URL structure (or whatever you had previously) and use the new /articles/ structure (or whatever you chosen).
Make sure that you continue to monitor the traffic performance of your website over the course of the coming weeks and months. But rest well knowing that you have taken what is probably the lowest risk approach to changing your URL structure.
What if you did see a decrease in performance?
The first thing you are going to want to verify is that you have setup the test properly. Open up a few of your test URLs and make sure that your content is accessible at its new location.
All clear? Good, moving on. No? Re-read this post, you have missed something.
Check the previous URL for this content (the version which in our example would have had the /yyyy/mm/dd structure). When navigating to that URL are you redirected to the new test URL?
Yes? Good, moving on. No? Again, re-read this post, you've probably missed a step.
Also, make sure you are running these tests as a logged-out, anonymous user with no browser cache, as this can affect results (browsers cache redirects).
If both of those checks result in successful redirection, look at your the 404 logs on your server to see if there ever was any interruption in resource availability. Unlikely, but worth ruling out.
While there are other possibilities, those are the most likely. If you've excluded those options and performance on these test URLs has taken a dip, you have a few main options:
- Wait a few weeks, the situation may improve
- Wait for the next major algorithm update from Google. These are generally spaced 6-8 months apart, so we don't recommend this, but Google should be able to find this content and understand the redirect, so it is possible that a full re-crawl of your site in anticipation of a major algorithm rollout could result in a change in performance, but consider this an edge case.
- Revert your changes and walk away knowing that you tested making this URL structure change, and that it would have been catastrophic had you made it globally, and you just saved either yourself or your client (or both) a lot of heartache, which makes you fantastic and well ahead of the pack.
Our Results: A very big win
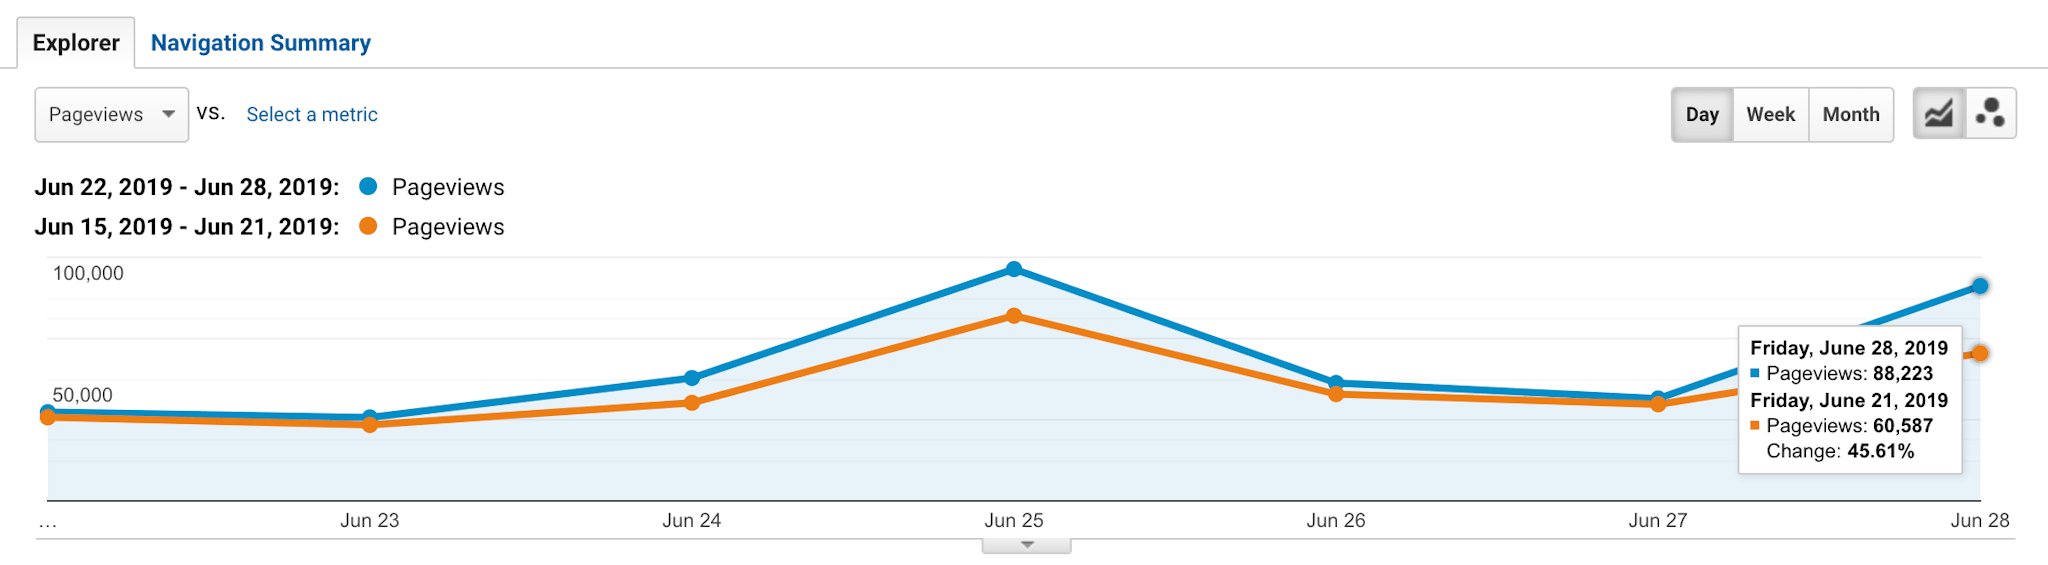
In our experience, this method worked incredibly well, and the client not only maintained their traffic for the test posts, but dramatically improved it for nearly all posts tested.
The best part is this: at no point during this test were they ever severely exposed to a massive risk with their traffic. And traffic is up considerably as a result.
We feel that this recipe is the missing "secret" for safely making site-wide URL structure changes.
Need help running this test, or want us to do it for you?
No problem, we'd be happy to help. Reach out to us with some basic details about your website and we'll follow-up with you.
Comments